Day 6: Complete the activities below
Medical Imaging Day 6 Part 1: Fetal Measurements
Objective: Identify the uses of ultrasound and the technology that produces them.
Mrs. Wilkerson comes in for her ultrasound appointment. An ultrasound is a medical imaging tool that uses sound waves instead of radiation. An ultrasound, also called a sonogram, is effective at showing soft tissues. Since ultrasound uses sound technology, it can be used safely by people who must avoid exposure to radiation. This includes people with metal in their body, such as certain kinds of clips used in surgical repairs. Ultrasound is also safe for people who have pacemakers, devices that are implanted under the skin and regulate heartbeat. The technology is also safe to use during pregnancy. Mrs. Wilkerson is in her 18th week of pregnancy, about half-way through. Her doctor has ordered an ultrasound to make sure the baby is healthy. The use of ultrasounds during pregnancy is one of the most common uses of this technology.
Noah’s colleague in the imaging department, Abbie, is a diagnostic medical sonographer, more commonly known as an ultrasound technologist. Abbie greets Mrs. Wilkerson and walks her back to the ultrasound room. Abbie explains the procedure. Mrs. Wilkerson laughs and explains, “This is my third child.” Abbie laughs, too, and says, “I guess that means you know what comes next.” “Yes, I sure do,” says Mrs. Wilkerson. She goes into the changing room and puts on a hospital gown. Abbie helps her in getting on the examining table. “Okay,” says Abbie, “let’s get started.” |
|
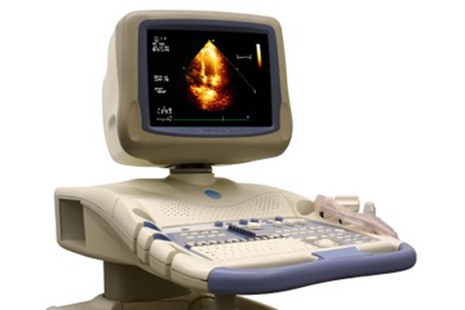
Ultrasound Technology
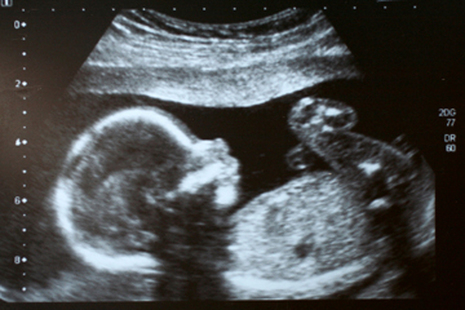
Abbie applies a gel to Mrs. Wilkerson’s abdomen and places a wand device on her stomach. This wand is the probe which generates sound pulses. As the sound waves strike materials, the wave bounces back to the probe. The probe detects this, much like an echo. In fact, the ultrasound images are called echoes. The device measures the amount of time it takes for the wave to travel back to the probe. Materials of different density have different echoes. This makes it possible to create images based on the density of the materials. Ultrasound produces continuous images, creating a video. It’s also possible to create three-dimensional images, which, coupled with the video, allows a doctor to see movement in the body. Abbie is able to complete the ultrasound for Mrs. Wilkerson in about 15 minutes. “Okay, Mrs. Wilkerson, I will get this to your doctor right away. Your doctor will analyze it and provide you with a report. In the meantime, I can give you this.” Abbie smiles and hands Mrs. Wilkerson an image of one frame from the ultrasound. Mrs. Wilkerson looks at it and smiles as she says, “Baby’s first picture.”
|
In order to become an ultrasound technologist, Abbie took a two-year program at the community college. She also received certification from her professional association, the American Registry for Diagnostic Medical Sonography (ARDMS). Some of her colleagues specialize in a type of sonography that examines heart function. This is called an echocardiogram. Echo refers to the ultrasound technology. Cardio refers to the heart. Often the procedure is simply called an “echo.” Echocardiograms are a widely used test. They are used in diagnosing heart disease. |
Science Connection
Sound Waves
Ultrasounds use sound waves but they are sounds that humans can’t hear. Sounds are generated by motions that push air molecules. When you close a door rapidly, it slams and makes a big noise. Sometimes you can even feel the wind from a slamming door. So it makes sense that the sound is caused by air molecules moving in a wave. This actually applies to all sounds. When you speak, your vocal cords vibrate, moving rapidly. When you play a guitar, the strings vibrate. When you listen to music with earphones, tiny speakers in the device vibrate. In all of these examples, movement pushes the molecules in air, to create a sound wave. The waves travel to the ears. The ears sense this movement of the air molecules. The nerves in our ears translate these vibrations into words or music, or slamming door.
Like the electromagnetic spectrum, sound is also measured in waves and frequencies. Unlike light energy, sound only occurs in a medium. This means that there must be molecules for the vibrations to “bump into.” The medium could be air, or water, or even a solid material. You can’t hear sound in a vacuum because there are no molecules in a vacuum. Where light energy travels at the rate of 186,000 miles per second, sound is slower. Sound waves travel through air at about 1,130 feet per second. It’s faster in water, where the molecules are packed more densely, traveling at almost 5,000 feet per second (nearly a mile).
Sound frequencies refer to the number of waves that pass a certain point in a given amount of time. They are measured in cycles per second. The unit of measure is called a Hertz, abbreviated as Hz. Most people can hear very low, bass sounds at about 20 Hz up to very high pitched sounds at 20,000 Hz. As people get older, they often lose the ability to hear sounds at the highest ranges. The frequencies used for an ultrasound are very fast, from 2 to 18 megahertz. This is thousands of times higher than the frequencies that we can hear. |

|
Medical Imaging Day 6 part 2: Quiz over Sonography
(Click here for the quiz)
Medical Imaging Day 6 part 3: Taking fetal measurements
In this activity, you will use a software program, digital ultrasound images, and your math skills to determine the size of a fetus. You will take measurements of the head diameter (often called the biparietal diameter), femur length and abdomen diameter. From these measurements, you will calculate the head circumference and abdomen circumference of the fetus, and finally, use a chart to determine the gestational age of the fetus.
Materials:
Fetal Measurements Worksheet
RADinfo programs (try the PC in the back of the room.)
Fetal Measurments
(Click here for Medical Imaging Worksheet)
Fetal Measurements
1. Launch RADinfo SYSTEMS on the laptop in the back of the room. Do this by opening the folder labeled RADinfo on the desktop.
2. Find and click the blue icon labeled RSVS.
3. Under Patient Name, double-click on Demo_US, Demo.
4. Talk to your instructor if you need help.
There are several ultrasound images on this patient record. You will need to scroll through the images to find the 3 images you see below, and use them to take 4 measurements.
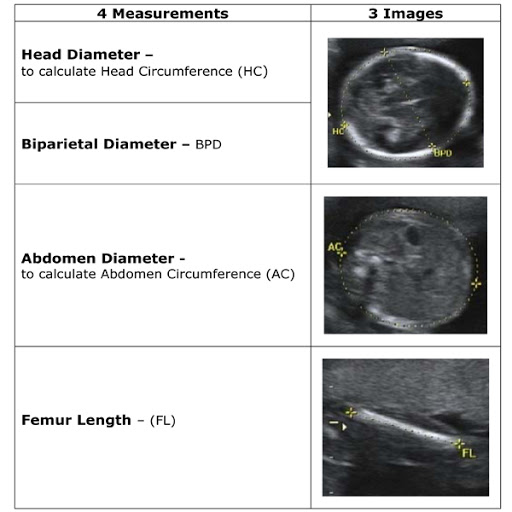
Select the image to measure Head Diameter.
Click the Measurement Toolbox icon at the top of your screen.
Calibration
Before you can accurately measure the distance, you must first calibrate.
On the side of each image, you will see vertical dashes. These dashes are 10 mm apart.
Click Calibrate. The Measurement Calibration window will appear.
Left-click and hold on one dash, and then drag up or down to the next vertical dash and release.
Currently, your measurement is shown in “pixels.”
In the Measurement Calibration window, select Manually Provide Reference Size.
Under Reference Length, enter 10.
Select mm.
Click OK.
In the following window, select No.


- You can now begin to take accurate measurements on this image. Measure distance by selecting the ruler button.
- Make sure the Units are in millimeters. If they are not, click on the Unit button until mm is displayed.
- Just like in the image below, left-click on the first + and drag the cursor to the second + and release. If the measurement reading is too small to read, click on the large A button in the Measurement Toolbox to increase the font size.
- Record this measurement on your worksheet.
- Using the same image, now take the Biparietal Diameter measurement and record it on your worksheet.
- Scroll through the images and find the image used to measure Abdomen Diameter. Repeat all the steps starting at Calibration.
- Scroll through the images and find the image used to measure Femur Length. Repeat all the steps starting at Calibration.


- On your worksheet, calculate the head circumference using the formula below.
Pi x HD = Head Circumference
or
3.1416 x Head Diameter = Head Circumference
- On your worksheet, calculate the abdomen circumference using the formula below.
Pi x AD = Abdomen Circumference
or
3.1416 x Abdomen Diameter = Abdomen Circumference
- Using answers 3-6 from your worksheet, compare them to the top line of the four graphs below. Find where each measurement intersects with the gestational age. Record those four numbers on your worksheet.
- Finally, add the four gestational ages together and divide by 4 to find the average. Record your estimation on the worksheet.


